A web browser will need to be configured to access sites and services on the I2P network, and to utilize outproxies. Below are walkthroughs for some of the most popular browsers.
用于 Windows 的 Firefox 配置文件
If you are using Windows, the recommended way of accessing the I2P network is using the Firefox profile.
If you used the Easy-Install bundle, the Firefox profile is included and you can skip this page.
If you do not wish to use that profile or are not on Windows, you will need to configure a browser.
How To Configure Your Browser
Firefox
使用I2P in Private Browsing扩展一键配置
还有一种实验性的新方法用于自动配置I2P浏览器。它使用Firefox的“标签页容器”来隔离I2P网页和其他普通网页。
同时通过启用一些浏览器内置隐私设置,如ResistFingerprinting来强化您的浏览器,并强制关闭WebRTC代理。它还包含菜单,快捷方式和监视工具以改善Firefox与 I2P的集成。当然,这不会干扰你的非I2P网页。
扩展I2P in Private Browsing现已位于Mozilla扩展商店。
插件的源代码请查看i2pgit.org
Firefox 57 及以上的配置方法
从右上角的菜单按钮选择设置,滚动到网络设置小节,如下方截图所示。点击设置

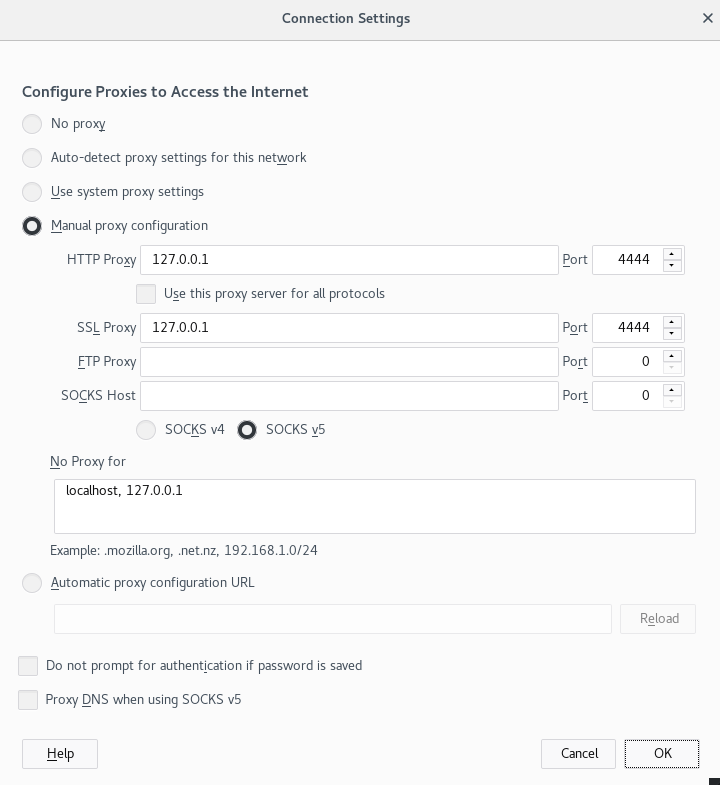
在连接设置弹窗中,选择手动代理配置。将 HTTP 和 SSL 代理地址设置为 127.0.0.1 端口设置为 4444 ,如下方截图所示。
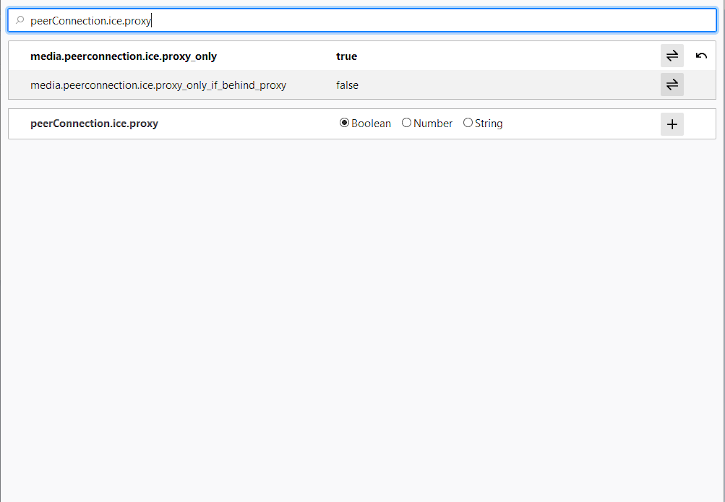
Finally, go to the address about:config and find the property media.peerConnection.ice.proxy_only. Ensure that this setting is True. Now find the property keyword.enabled, and set it to False.
Chrome
使用一键配置扩展:I2PChrome.js(Experimental, additional configuration)
实验性的半自动化的Chrome浏览器配置已经可用。为了使用它,请创建一个与默认配置文件分开的,新的用户配置专门用于您的I2P浏览。然后在您新创建的配置文件中安装扩展即可,详细的说明可在homepage 查看。
所有 Chrome 版本
基于 Chromium 的浏览器如 Chrome 拒用略微不同的代理设置位置,取决于变体和平台。例如这些说明可能会在 Brave 或 Irudium 中略有不同。从主菜单进入设置并搜索菜单项即可。
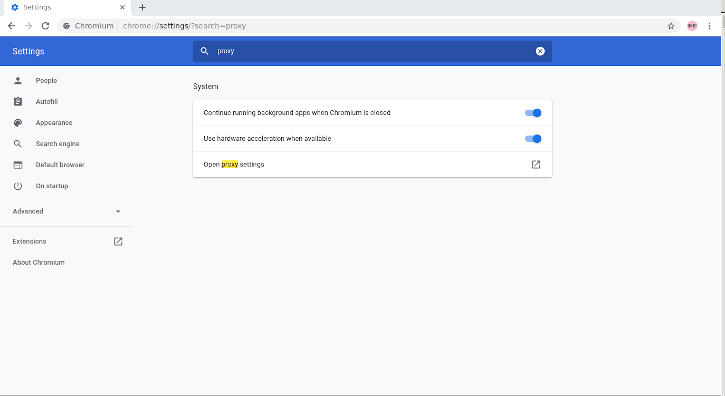
在 Windows 上,此按钮将带您进入Internet Explore使用的共享代理设置,您可跟随 Internet Explorer 8 指导进行配置,
IceRaven 及其他 Firefox for Android
基于扩展的配置
现代 Firefox(基于 Fenix 的 Firefox)通常没有 about:config 页面手动配置代理。在基于 Fenix 的 Firefox 中也无法使用大多数扩展。写作本文时在 Firefox Nightly 中可启用 about:config 支持和更多扩展,但这是一个手动且困难的过程。IceRaven 是 Firefox 的一个分叉,在 Mozilla 及社区进行在 Firefox for Android 中添加扩展支持的工作时启用了一系列扩展。它提供了配置 Andorid 上基于 Firefox 的现代浏览器的最简单方法。它不来自于 Mozilla 也不受其担保。在 IceRaven 中安装此扩展将通过 I2P 代理您的全部 IceRaven 浏览。(译者注:2022年Firefox上安装SwitchOmega等代理管理插件已经很容易,请直接访问Mozilla插件商店)
如果您尚未安装 IceRaven,前往下一步。如果您已使用 IceRaven 一段时间,前往主菜单,选择历史标签页,并点按“删除历史记录”确保您已清除过去的浏览信息。
打开 IceRaven 主菜单,滚动到顶部直到您看到“扩展程序”子菜单。点按“扩展程序”子菜单中的“扩展程序管理器”选项。安装I2P Proxy for Android and other Systems。
您的 IceRaven 浏览器已配置为使用 I2P。
此扩展也可在 Fenix 之前(Firefox 68 之前)的基于 Firefox 的浏览器上使用,如果从以下 addons.mozilla.org URL 安装。 Android 及其它系统的 I2P 代理
此扩展与 Chromium 扩展完全相同,从相同的源代码构建。
为在 Firefox Nightly 中启用扩展支持,您应遵照 Mozilla 在他们的博客中提供的步骤。
Internet Explorer
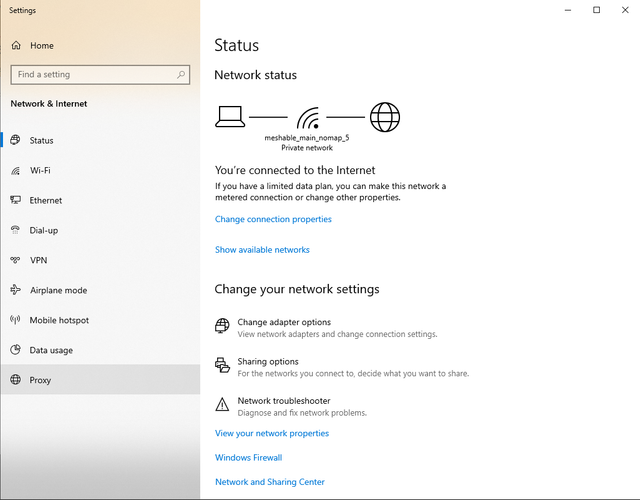
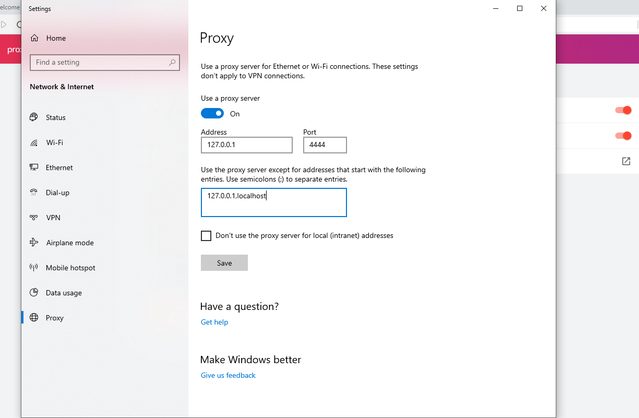
在开始菜单中搜索“网络和 Internet 设置”并打开。菜单中的最后一项是代理设置,点击并设置代理连接到 I2P。
现在勾选“为 LAN 使用代理服务器”和“对于本地地址不使用代理服务器”。点击“高级”按钮来打开端口设置。如图在HTTP中输入IP 127.0.0.1和端口4444,在HTTPS中输入IP 127.0.0.1和端口4445。按确定来保存设置。你的浏览器现在已经被配置为使用I2P代理。
出口代理使用协议
The I2P network is a peer-to-peer overlay network. Proxying to the clearnet is not part of its design or function with regards to its communication protecting network features.
The I2P Project itself does not run any proxies to the Internet. The I2P software includes a default outproxy: exit.stormycloud.i2p. These are run by StormyCloud Inc.
https://stormycloud.org默认情况下,I2P自带一个已经配置的出口代理:exit.stormycloud.i2p。
可通过.i2p地址访问的I2P站点也 不允许通过出口代理。
Tor是一个不错的,可以作为公共互联网出口代理的软件。


