")


This is a tutorial on how to set up and tweak an I2P tunnel in order to use it to access an SSH server remotely, using either I2P or i2pd. For now, it assumes you will install your SSH server from a package manager and that it's running as a service.
Considerations: In this guide, I'm assuming a few things. They will need to be adjusted depending on the complications that arise in your particular setup, especially if you use VM's or containers for isolation. This assumes that the I2P router and the ssh server are running on the same localhost. You should be using newly-generated SSH host keys, either by using a freshly installed sshd, or by deleting old keys and forcing their re-generation. For example:
sudo service openssh stop
sudo rm -f /etc/ssh/ssh_host_*
sudo ssh-keygen -N "" -t rsa -f /etc/ssh/ssh_host_rsa_key
sudo ssh-keygen -N "" -t dsa -f /etc/ssh/ssh_host_dsa_key
sudo ssh-keygen -N "" -t ecdsa -f /etc/ssh/ssh_host_ecdsa_key
sudo ssh-keygen -N "" -t ed25519 -f /etc/ssh/ssh_host_ed25519_key
Step One: Set up I2P tunnel for SSH Server
Using Java I2P
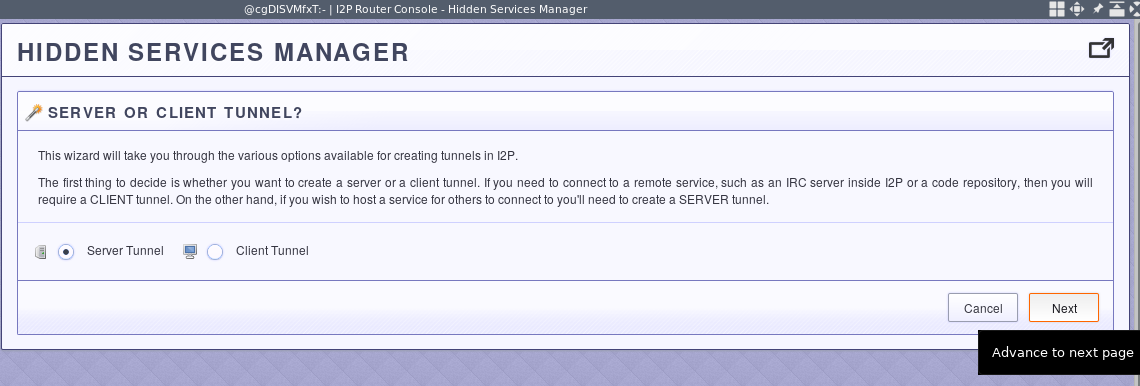
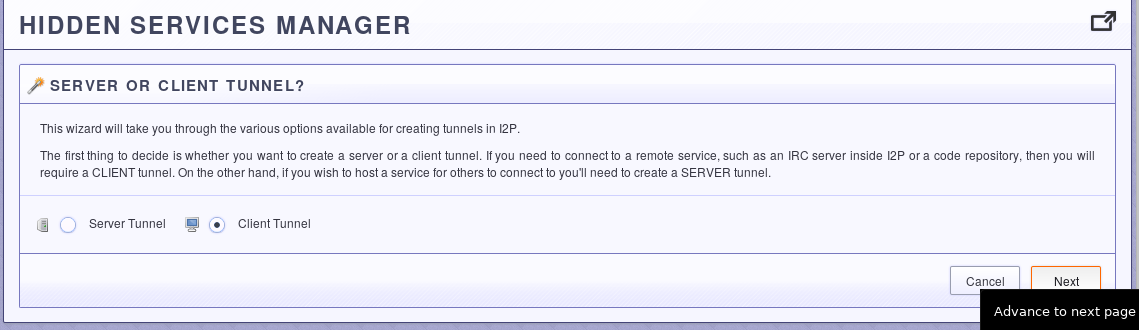
Using java I2P's web interface, navigate to the (Links to your Router Console)Hidden Services Manager and start the tunnel wizard.
Assistente de Túneis
Since you are setting up this tunnel for the SSH server, you need to select the "Server" tunnel type.
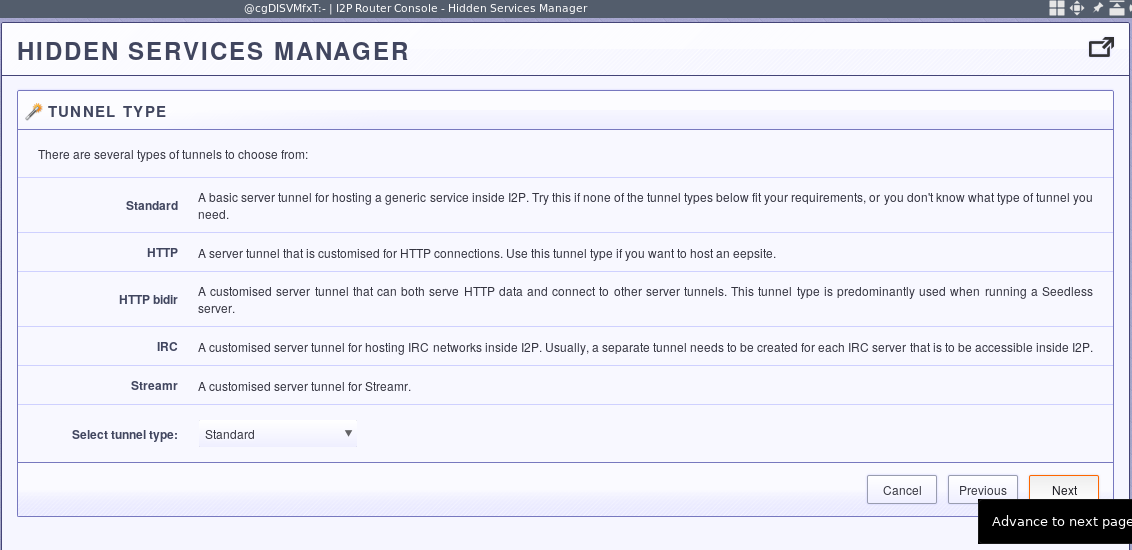
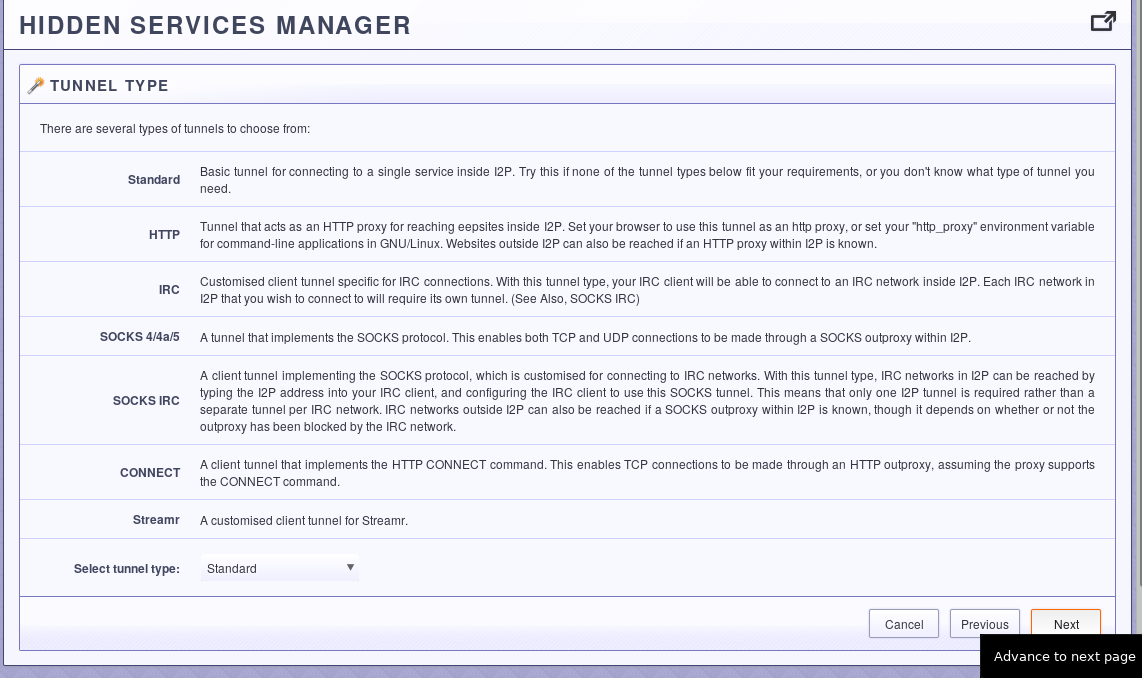
You should fine-tune it later, but the Standard tunnel type is easiest to start with.
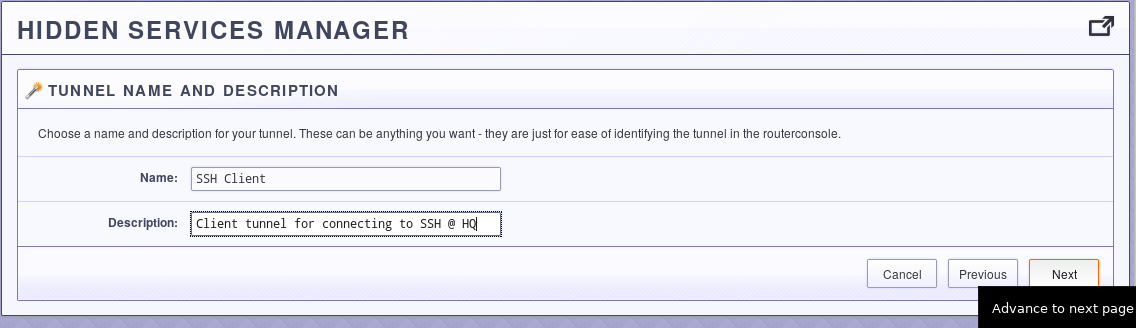
Give it a good description:

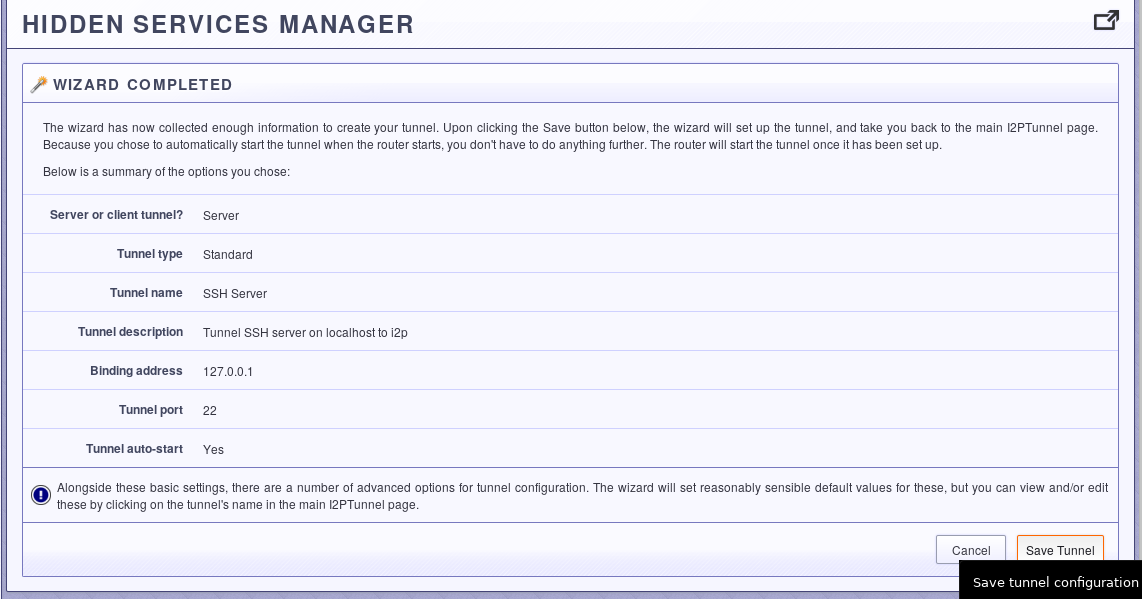
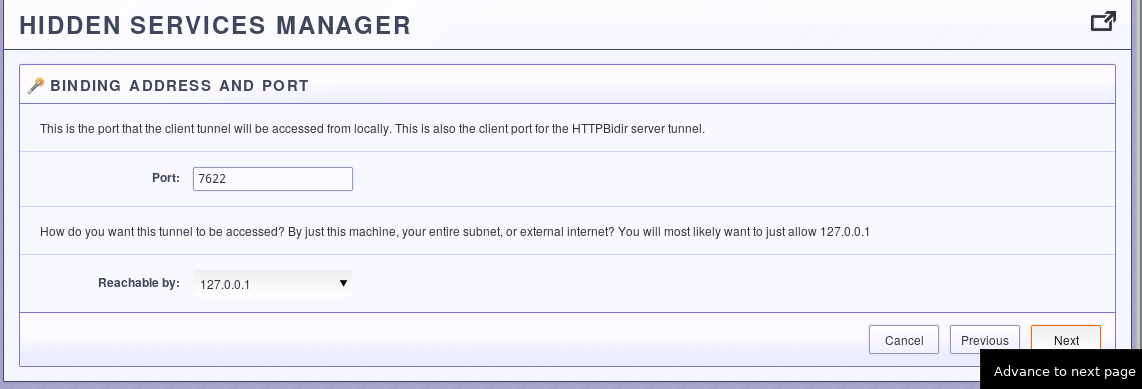
And tell it where the SSH server will be available.

Look over the results, and save your settings.
Configurações Avançadas
Now head back over the the Hidden Services Manager, and look over the available advanced settings. One thing you'll definitely want to change is to set it up for interactive connections intstead of bulk connections.
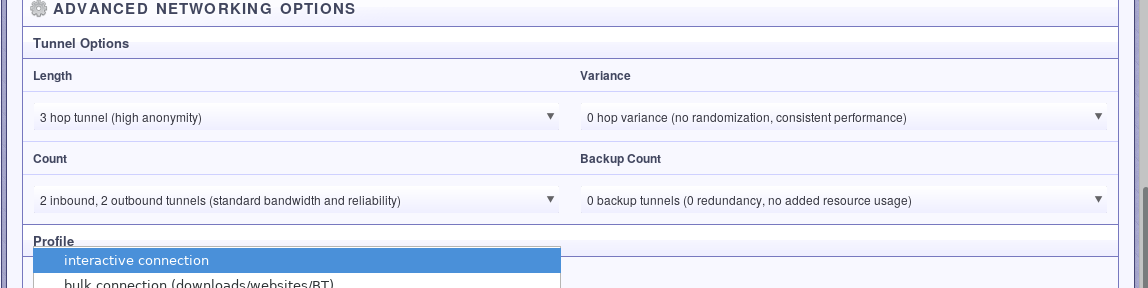
Besides that, these other options can affect performance when accessing your SSH server. If you aren't that concerned about your anonymity, then you could reduce the number of hops you take. If you have trouble with speed, a higher tunnel count might help. A few backup tunnels are probably a good idea. You might have to dial-it-in a bit.

Finally, restart the tunnel so that all of your settings take effect.
Another interesting setting, especially if you choose to run a high number of tunnels is "Reduce on Idle" which will reduce the number of tunnels that run when the serve has experienced extended inactivity.

Using i2pd ~~~~~~~~~~---------------------------
With i2pd, all configuration is done with files instead of via a web interface. In order to configure an SSH Service tunnel for i2pd, tweak the following example settings to your anonymity and performance needs and copy them into tunnels.conf
[SSH-SERVER]
type = server
host = 127.0.0.1
port = 22
inbound.length = 1
outbound.length = 1
inbound.quantity = 5
outbound.quantity = 5
i2cp.reduceOnIdle = true
keys = ssh-in.dat
Restart your I2P router
Step Two: Set up SSH server
Depending on how you want to access your SSH Server, you may want to make a few changes to the settings. Besides the obvious SSH hardening stuff you should do on all SSH servers(Public-Key Authentication, no login as root, etc), if you don't want your SSH server to listen on any addresses except your server tunnel, you should change AddressFamily to inet and ListenAddress to 127.0.0.1.
AddressFamily inet
ListenAddress 127.0.0.1
If you choose to use a port other than 22 for your SSH server, you will need to change the port in your I2P tunnel configuration.
Step Three: Set up I2P tunnel for SSH Client
You will need to be able to see the I2P router console of the SSH server in order to configure your client connection. One neat thing about this setup is that the initial connection to the I2P tunnel is authenticated, somewhat reducing the risk of your initial connection to the SSH server being MITM'ed, as is a risk in Trust-On-First-Use scenarios.
Using Java I2P
Assistente de Túneis
First, start the tunnel configuration wizard from the hidden services manager and select a client tunnel.
Next, select the standard tunnel type. You will fine-tune this configuration later.
Give it a good description.
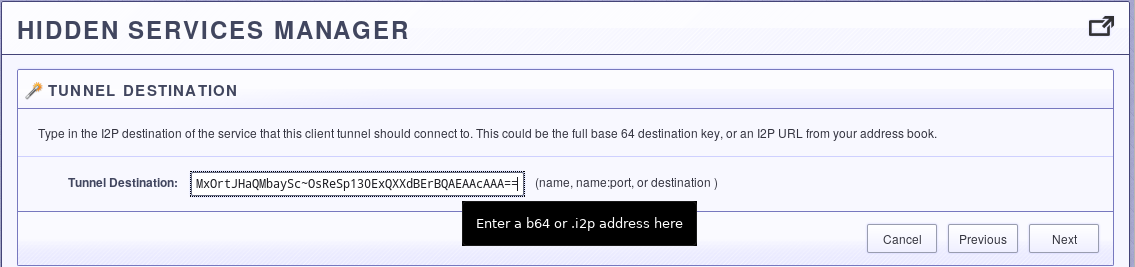
This is the only slightly tricky part. Go to the hidden services manager of the I2P router console and find the base64 "local destination" of the SSH server tunnel. You'll need to find a way to copy this information into the next step. I generally Tox it to myself, any off-the-record should be sufficient for most people.

Once you've found the base64 destination you want to connect to transmitted to your client device, then paste it into the client destination field.
Lastly, set a local port to connect your ssh client to. This will local port will be connected to the base64 destination and thus the SSH server.
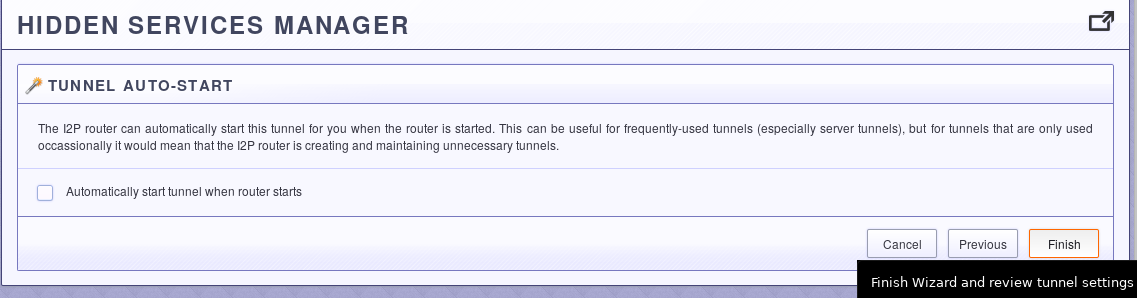
Decide whether you want it to start automatically.
Configurações Avançadas
Like before, you'll want to change the settings to be optimized for interactive connections. Additionally, if you want to set up client whiteliting on the server, you should check the "Generate key to enable persistent client tunnel identity" radial button.

Using i2pd
You can set this up by adding the following lines to your tunnels.conf and adjust it for your performance/anonymity needs.
[SSH-CLIENT]
type = client
host = 127.0.0.1
port = 7622
inbound.length = 1
outbound.length = 1
inbound.quantity = 5
outbound.quantity = 5
i2cp.dontPublishLeaseSet = true
destination = thisshouldbethebase32ofthesshservertunnelabovebefore.b32.i2p
keys = ssh-in.dat
Restart the I2P router on the client
Step Four: Set up SSH client
There are lots of ways to set up an SSH client to connect to your server on I2P, but there are a few things you should do to secure your SSH client for anonymous use. First, you should configure it to only identify itself to SSH server with a single, specific key so that you don't risk contaminating your anonymous and non-anonymous SSH connections.
Make sure your $HOME/.ssh/config contains the following lines:
IdentitiesOnly yes

Host 127.0.0.1
  IdentityFile ~/.ssh/login_id_ed25519
Alternatively, you could make a .bash_alias entry to enforce your options and automatically connect to I2P. You get the idea, you need to enforce IdentitiesOnly and provide an identity file.
i2pssh() {
    ssh -o IdentitiesOnly=yes -o IdentityFile=~/.ssh/login_id_ed25519 serveruser@127.0.0.1:7622
}
Step Five: Whitelist only the client tunnel
This is more-or-less optional, but it's pretty cool and will prevent anyone who happens to come across your destination from being able to tell you are hosting an SSH service.
First, retrieve the persistent client tunnel destination and transmit it to the server.

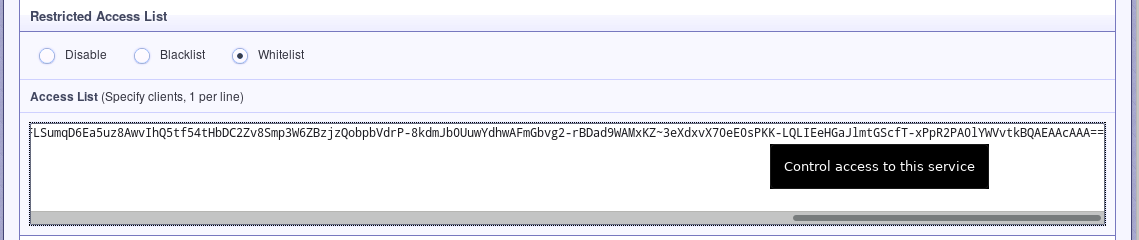
Add the client's base64 destination to the server's destination whitelist. Now you'll only be able to connect to the server tunnel from that specific client tunnel and no one else will be able to connect to that destination.
Mutual authentication FTW.